
iPad 5 Screen Repair Guide: Touch Screen Digitizer Replacement
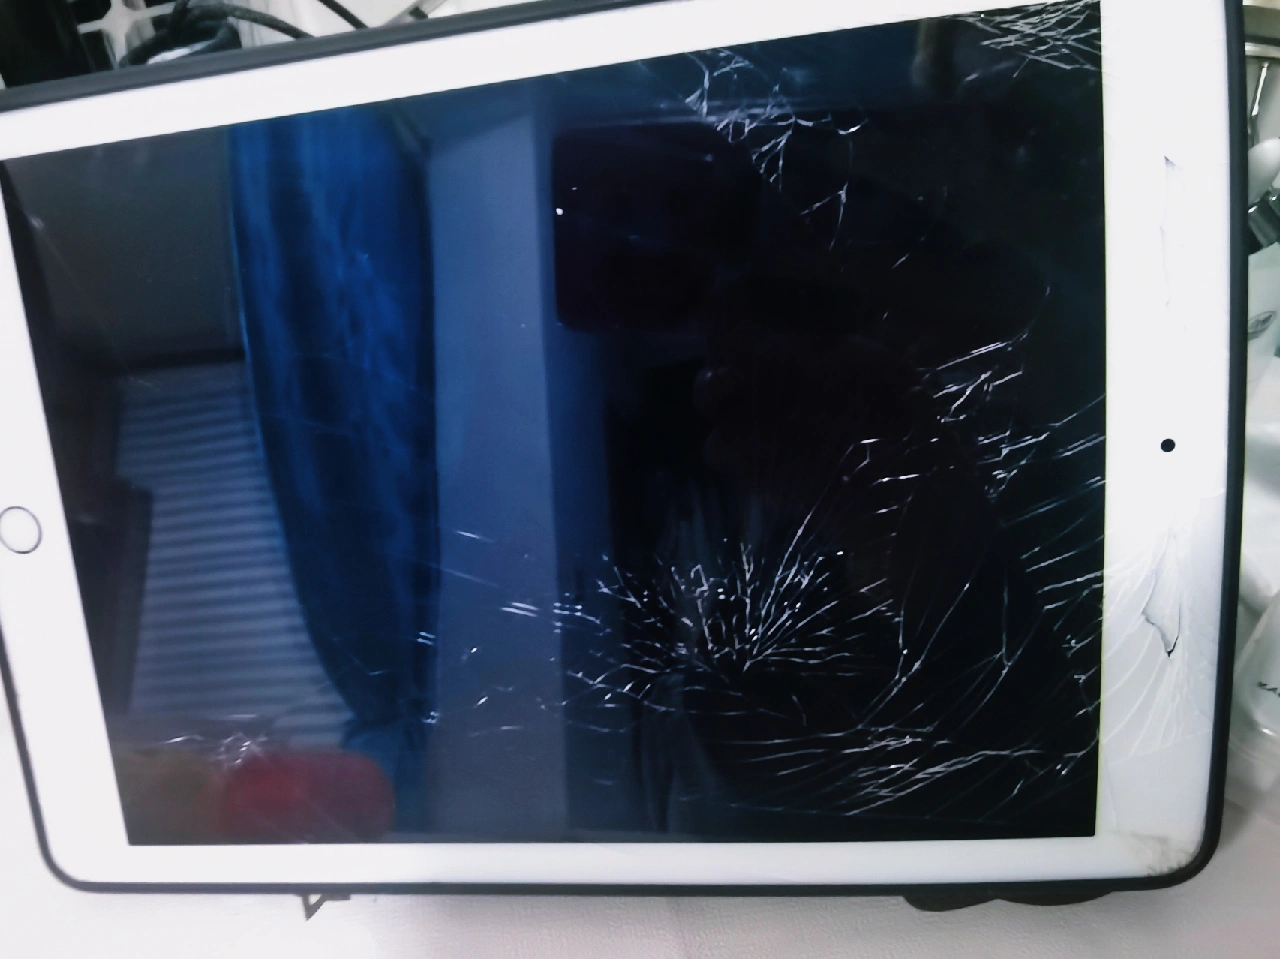
Image Alt Text: iPad 5 cracked touch screen before repair
The iPad 5th generation is still widely used in schools, offices, repair shops, and second-hand electronics markets. Apple identifies the iPad 5th generation as the 2017 9.7-inch iPad, with model numbers A1822 for Wi-Fi version and A1823 for Wi-Fi + Cellular version. It features a 9.7-inch Retina display with 2048 × 1536 resolution.
For repair shops and parts wholesalers, iPad 5 screen repair is still a common service. The most frequent problem is cracked front glass or an unresponsive touch screen. In many cases, the LCD display may still work normally, while only the outer touch screen digitizer needs to be replaced.
This guide explains common iPad 5 screen problems, repair precautions, and how to choose a suitable replacement touch screen digitizer.
1. Common iPad 5 Screen Problems
Image Alt Text: Common iPad 5 screen damage problems
Before replacing the screen, technicians should first confirm the actual fault. Common iPad 5 screen issues include:
| Problem | Possible Cause | Repair Suggestion |
|---|---|---|
| Cracked front glass | Drop damage or pressure damage | Replace touch screen digitizer |
| Touch not working | Damaged digitizer or flex cable | Test and replace digitizer |
| Ghost touch | Poor-quality digitizer, dust, grounding issue | Reinstall or replace part |
| Black display | LCD damage, battery issue, motherboard issue | Test LCD and power circuit |
| Display works but touch fails | Digitizer fault | Replace touch glass panel |
| Home button not working | Home button flex cable damage | Inspect original home button carefully |
For iPad 5, the front touch glass and LCD are separate parts. This means that if the LCD image is normal, the repair shop usually only needs to replace the touch screen digitizer instead of the full display assembly.
2. Confirm the Correct iPad Model Before Repair
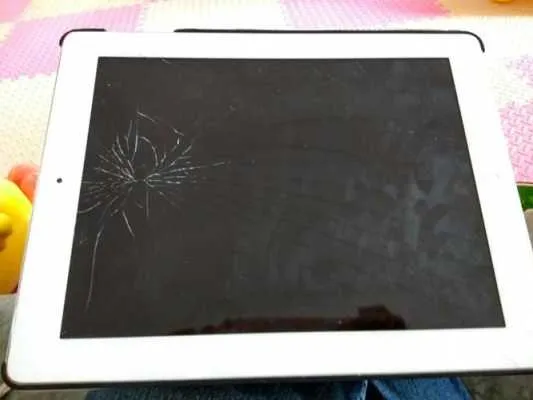
Image Alt Text: Check iPad 5 model number A1822 A1823
Before ordering replacement parts, always confirm the model number on the back cover of the iPad.
The iPad 5th generation supports:
| iPad Version | Model Number |
|---|---|
| iPad 5 Wi-Fi | A1822 |
| iPad 5 Wi-Fi + Cellular | A1823 |
This step is important because different iPad generations may look similar, but their screen connectors, glass size, and internal structure may be different. Ordering the wrong touch screen can cause installation failure, poor fit, or touch malfunction.
3. Tools Needed for iPad 5 Touch Screen Replacement
Image Alt Text: Tools for iPad 5 screen repair
A professional iPad 5 screen repair usually requires:
- Heat gun or heating pad
- Suction cup
- Plastic opening picks
- Anti-static tweezers
- Precision screwdriver
- Spudger
- New iPad 5 touch screen digitizer
- Pre-cut adhesive tape
- Cleaning cloth and dust remover
- Screen clamps or rubber bands
For repair shops, using proper tools can reduce the risk of LCD damage, frame bending, or home button flex cable tearing.
4. iPad 5 Screen Replacement Process
Step 1: Power Off the Device
Before repair, fully power off the iPad. Do not repair the device while it is turned on. This helps reduce the risk of short circuits or accidental touch input.
Step 2: Heat the Screen EdgesImage Alt Text: Heating iPad 5 screen edge before opening
The iPad 5 front glass is fixed with strong adhesive. Heat the edges evenly to soften the adhesive. Avoid overheating one area for too long, especially near the LCD and battery area.
A heating pad is usually safer and more stable than direct hot air for beginners.
Step 3: Separate the Front Glass Carefully
Insert a plastic opening pick into the edge of the glass and slowly move around the frame. Do not insert the tool too deeply, because the LCD, antennas, and flex cables may be damaged.
Special care should be taken around the home button area. The iPad 5 has Touch ID, so the original home button should be preserved whenever possible.
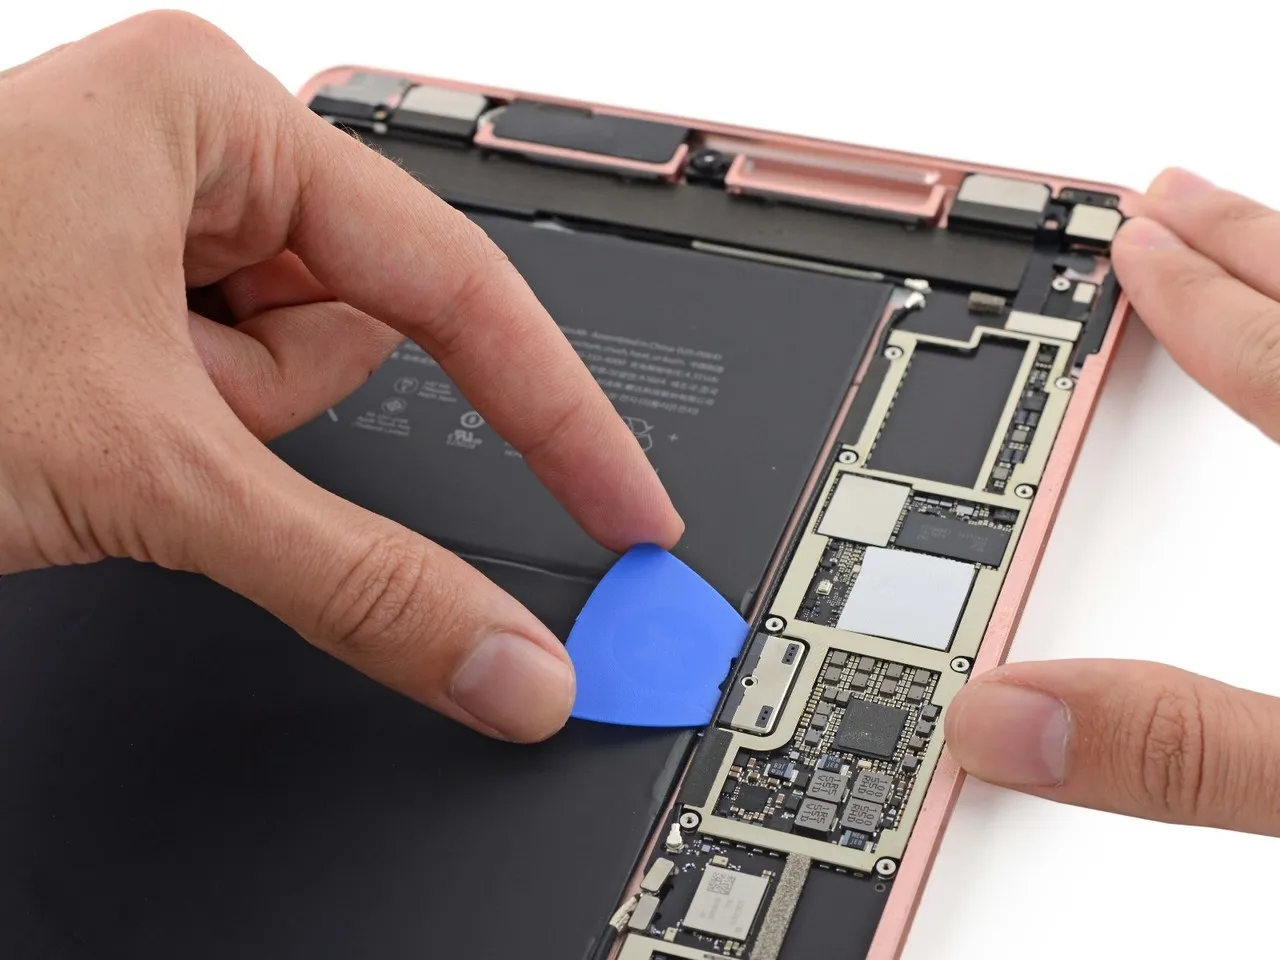
Step 4: Disconnect the Digitizer Flex Cable
Image Alt Text: Disconnect iPad 5 digitizer flex cable
After lifting the front glass, disconnect the digitizer flex cable carefully. Do not pull the cable by force. If the connector is damaged, the new screen may not work correctly.
Before removing the broken screen completely, check whether there are glass fragments or adhesive residue around the frame.
Step 5: Transfer the Original Home Button
The original home button is an important part of the repair. If the home button flex cable is damaged, Touch ID may stop working.
When transferring the home button:
- Heat the home button bracket gently
- Remove adhesive slowly
- Avoid bending the flex cable
- Keep the original home button clean
- Test the button before final sealing
This is one of the most delicate steps in iPad 5 screen repair.
Step 6: Test the New Touch Screen Before Final Installation
Image Alt Text: Testing new iPad 5 touch screen digitizer before installation
Before applying final adhesive and sealing the iPad, connect the new digitizer and test:
- Full-screen touch response
- No ghost touch
- No dead zones
- Home button function
- LCD display condition
- Front camera area alignment
- Sleep/wake function if applicable
Never skip this test. It can prevent rework after the screen has already been sealed.
Step 7: Clean the Frame and Apply Adhesive
Remove old adhesive, glass fragments, and dust from the iPad frame. A clean frame helps the new screen fit tightly and reduces the risk of lifting edges after repair.
Apply new pre-cut adhesive tape evenly. Make sure the adhesive does not cover the camera, sensors, speaker holes, or flex cable areas.
Step 8: Seal and Clamp the Screen
Image Alt Text: Sealing iPad 5 screen after digitizer replacement
After confirming the screen works properly, align the digitizer carefully and press the screen into place. Use screen clamps or rubber bands to keep pressure on the edges while the adhesive bonds.
Avoid pressing too hard on the LCD area.
5. Important Repair Tips for iPad 5
Image Alt Text: Professional iPad 5 screen repair quality check
For professional repair shops, the following details can improve repair quality:
Keep the original home button.
Replacing the home button may affect Touch ID function.
Test before sealing.
Always test the new digitizer before final installation.
Use high-quality adhesive.
Poor adhesive may cause screen lifting after several days.
Clean dust carefully.
Dust between the LCD and touch glass can affect the final appearance.
Check the frame condition.
If the frame is bent, the new screen may not fit properly.
Choose a stable supplier.
Low-quality digitizers may cause ghost touch, poor sensitivity, or high return rates.
6. How to Choose a Good iPad 5 Touch Screen Digitizer
AntSmart’s website focuses on iPad touchscreen products, screen assembly products, and customized indoor commercial screens, with product listings for multiple iPad touch screen replacement parts.
For repair shops, wholesalers, and distributors, a good iPad 5 touch screen digitizer should have:
| Feature | Why It Matters |
|---|---|
| Accurate model compatibility | Ensures perfect fit for A1822/A1823 |
| Stable touch sensitivity | Reduces ghost touch and dead zones |
| Strong adhesive option | Improves final installation quality |
| Clean glass surface | Better repair appearance |
| Reliable flex cable | Reduces connection failure |
| Pre-shipment QC | Helps lower defective rate |
| Safe packaging | Prevents breakage during shipping |
Choosing a reliable supplier is not only about price. Stable quality helps reduce customer complaints, repair rework, and after-sales costs.
7. When Should You Replace the Full Assembly Instead?
For iPad 5, if only the front glass is broken but the LCD still displays normally, replacing the touch screen digitizer is usually enough.
However, a full display repair may be needed if:
- The LCD is black
- There are colored lines on the display
- The image flickers
- There are white spots or pressure marks
- The LCD is cracked
- Backlight does not work
- Liquid damage is visible
In these situations, replacing only the touch digitizer may not solve the problem.
Conclusion
iPad 5 screen repair is still a common and valuable service for repair shops and parts distributors. The key to a successful repair is correct model identification, careful disassembly, original home button protection, pre-installation testing, and using a reliable replacement touch screen digitizer.
For bulk buyers, repair chains, and wholesalers, choosing a stable iPad 5 touch screen supplier can help improve repair success rate, reduce returns, and build long-term customer trust.
Call to Action
Looking for reliable iPad 5 touch screen digitizer replacement parts for repair shops or wholesale business?
Contact AntSmart to discuss model compatibility, product quality, packaging, bulk order requirements, and OEM/ODM cooperation.